How to Install I2P on Your Personal Computer: A Beginner-Friendly Guide
Free internet access and privacy protection are no longer luxuries – they’re the new minimum standard. If you want to browse the internet without surveillance or control, you may find I2P (Invisible Internet Project) or Tor useful. Unlike the regular web network, I2P uses encryption and routing through servers maintained by users worldwide to protect your personal data (such as your identity, location, and more).
In a nutshell, what you will learn by reading this article: “How to run I2P and Tor in a Docker Container: secure and safe access to the free internet”.
The main advantage of I2P is that you don’t need to be an expert to get started. Diva.exchange has developed beginner-friendly instructions to help you set up an I2P node on any computer. In this guide, we’ll show you how to install I2P (and also, at the same time, Tor) on your machine and explain how to use Docker containers for more security and convenience.
An important and general tip right now: whatever browser you’ll use, never surf the networks without having a strong Ad-Blocker (like “uBlock Origin”) and also a Script-Blocker (like “NoScript”) installed. Use your trusted extension store to install those two. You really don’t need other “privacy” extensions than those two. Especially “NoScript”, which prevents the execution of script languages in your browser, protects you from relevant known attacks, except, and only in theory, fingerprinting, which is a statistics- and data-based attack on privacy. However, fingerprinting without access to a locally executed script is statistically of no use. By using “NoScript”, you’ll also learn quickly that most websites don’t care about your privacy at all, although their marketing tells you a different story.
What you’ll need:
- A computer running Windows, macOS, or Linux
- A stable internet connection
- A web browser (Chrome, Firefox, Safari, etc.)
Basic Thoughts: Open Source and Privacy
Everything you are going to read here about software from diva.exchange is open source-based. Clear text: every piece of software which gets developed by diva.exchange is publicly available within and easily accessible worldwide repositories (these are libraries for software source code).
If you really care about your privacy, then you will trust only software where every line of source code is available in easily accessible public software repositories. All our software and our academic research are available here: https://github.com/diva-exchange. Please don’t forget to give our diva software repositories a star to show your appreciation.
Installing I2P and Tor in an Isolated and Secure Container: Simple and Reliable
Running I2P and Tor in a container offers a lot of advantages. Containers are available on many operating systems, like Windows, MacOS or Linux, through a software called “Docker”. If you’re new to Docker, here’s a simple explanation: Docker lets you run applications inside isolated and secured environments called containers. Such containers do reduce software-related risks (like malware or the abuse of your computer resources) to a technical minimum.
Why Use Docker?
- Open Source: Docker source code is publicly available.
- Isolation and Security → I2P runs in its own “sandbox,” independent of the rest of your system.
- Clean Setup → No leftover files; remove the container with a single command.
- Cross-Platform → Works the same way on Windows, macOS, and Linux.
- Simple Updates → Always get the latest versions.
- Convenience → You can dedicate a separate browser just for I2P – this significantly reduces your risk of getting “fingerprinted”.
If you don’t have Docker already available on your system:
- If you prefer written documentation, read https://docs.docker.com/get-started/get-docker/ and follow the instructions there. It is suitable for Windows, MacOS or Linux.
- Short and useful video for Windows users: https://www.youtube.com/watch?v=bw-bMhlhcpg
- Short and useful video for MacOS users: https://www.youtube.com/watch?v=jGlE1zhkV4I
- Short and useful video for Linux (Ubuntu) users: https://www.youtube.com/watch?v=J4dZ2jcpiP0
To get a deeper understanding of how Docker works, this video https://www.youtube.com/watch?v=pg19Z8LL06w on YouTube is a great investment of your time.
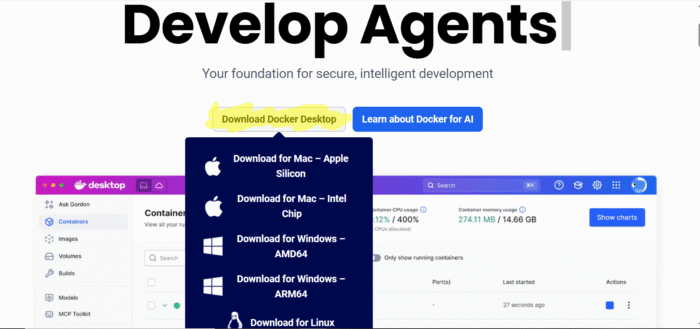
You can download Docker for your operating system here: https://www.docker.com/
https://www.docker.com/
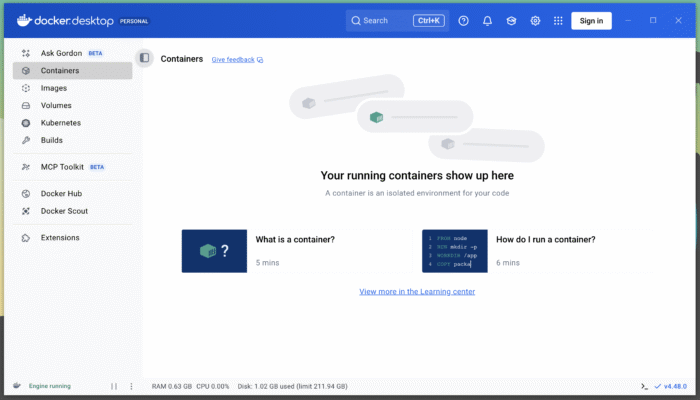
Now, as soon as you have Docker Desktop started on your computer, it will look initially like this:
How to run I2P and Tor in a Docker Container
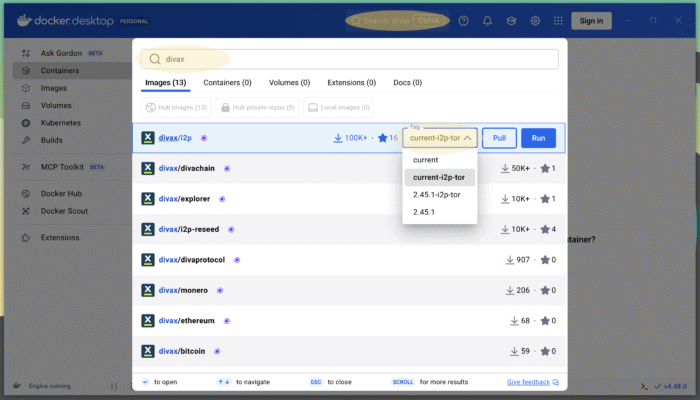
Your Docker Desktop application features a search function on top. There you search for “divax/i2p” and choose the i2p image using the tag “current-i2p-tor”. This looks like this:
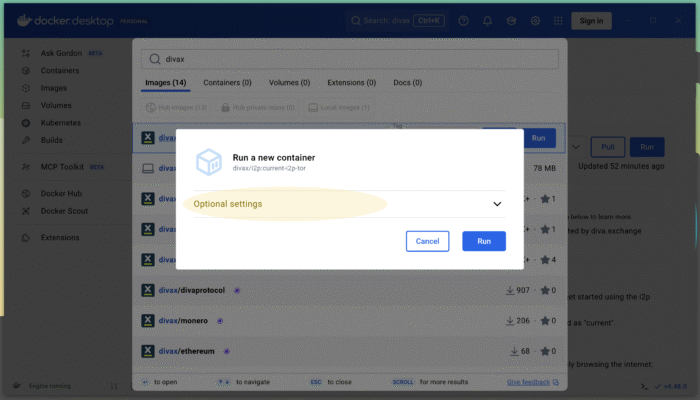
Now hit the blue “Run” button. The Docker image for I2P will be downloaded (known as “pull”) from the official Docker repositories. After the download has finished, you will be asked to setup your new container. Set the “Optional Settings” correctly, which looks like this:
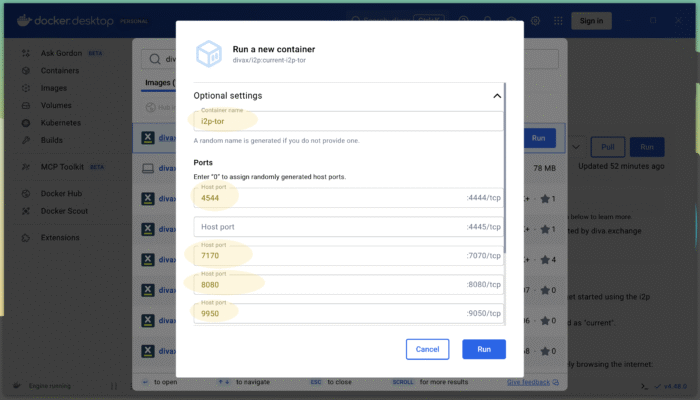
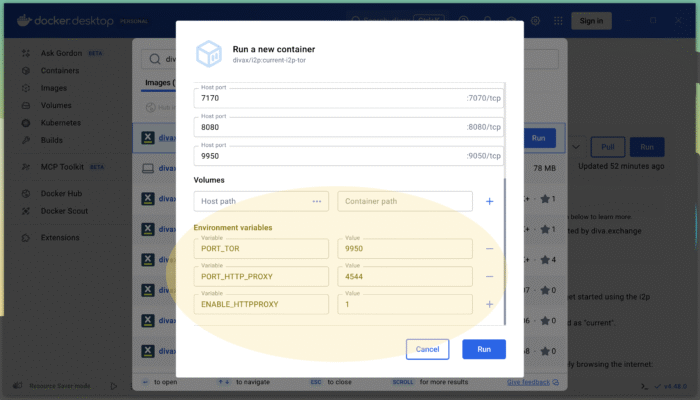
What are the “port” parameters for?
The ports define possible ways of communication between the container and your computer (the “host” in Docker parlance). You can imagine these ports as doors between two rooms, where the container is one room and your computer is the other. Since containers are a secure way to run applications on your computer, all ports between your computer and the container are closed by default. You, as a user, are in control and able to open only those ports which are useful and needed for a specific application.
The environment variables are used to configure your “proxy” definition file on your computer. Such a proxy definition file (a “.pac” file) is useful to configure your browser (like Firefox or Chrome). It will be shown further down how to use this proxy definition file. Note that the environment variables must be in line with the port settings.
PORT_TOR has to be in line with the host port value assigned to 9050/tcp within the container.
PORT_HTTP_PROXY has to be in line with the host port value assigned to 4444/tcp within the container.
To get a deeper understanding of the parameters and the environment variables, read the full divax/i2p documentation on https://hub.docker.com/r/divax/i2p.
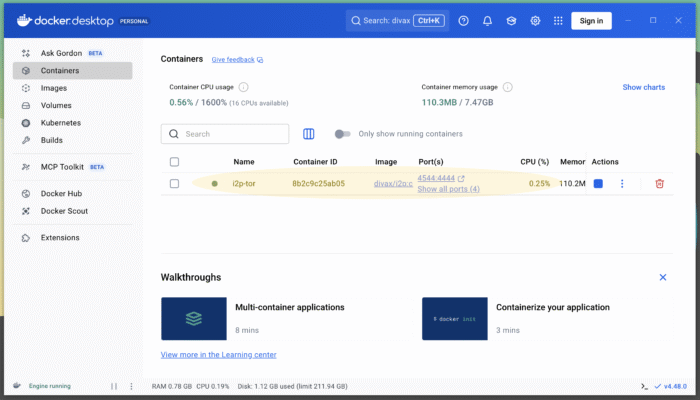
Now hit the blue “Run” button to start the container. The container will start – a green dot on the left will indicate that it’s up and running – and your Docker dashboard should look like this now:
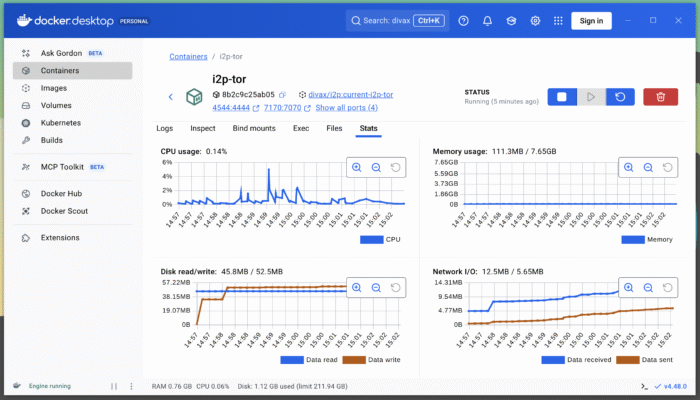
By double-clicking on a running container, like i2p-tor, you get access to all the details of what’s happening within the container. Statistics are available and look like this:
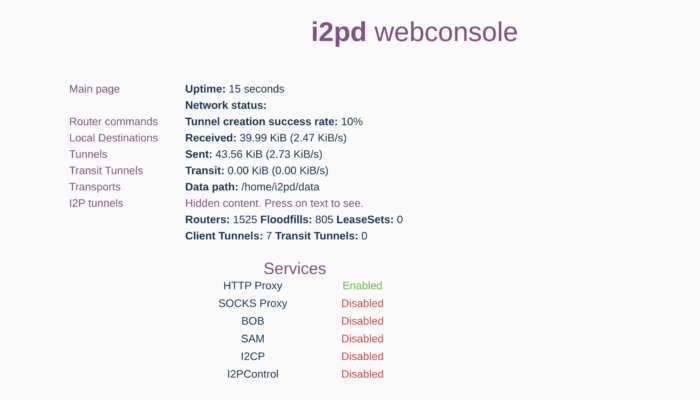
As you have now I2P available and running within a container, you can open a browser of your choice (like Chrome or Firefox) and navigate to http://localhost:7170. The address “localhost” points to your own computer, and the port 7170 is the one you have set as a parameter when you started your Docker container. Your browser will then display the I2P web interface, which looks like this:
Configure Your Browser
To access the I2P and the Tor network through a browser (we will show examples using Firefox and Chrome), it is important to set the proxy configuration properly. As mentioned above, a proxy definition file (a .pac file) has been created within the Docker container, and this proxy definition file is now available to any browser running on your computer.
Installation on Firefox
Important: before you change your settings below, make a screenshot of your existing settings and store the screenshot somewhere locally on your computer to restore your settings in case you would like to not use I2P and Tor no more.
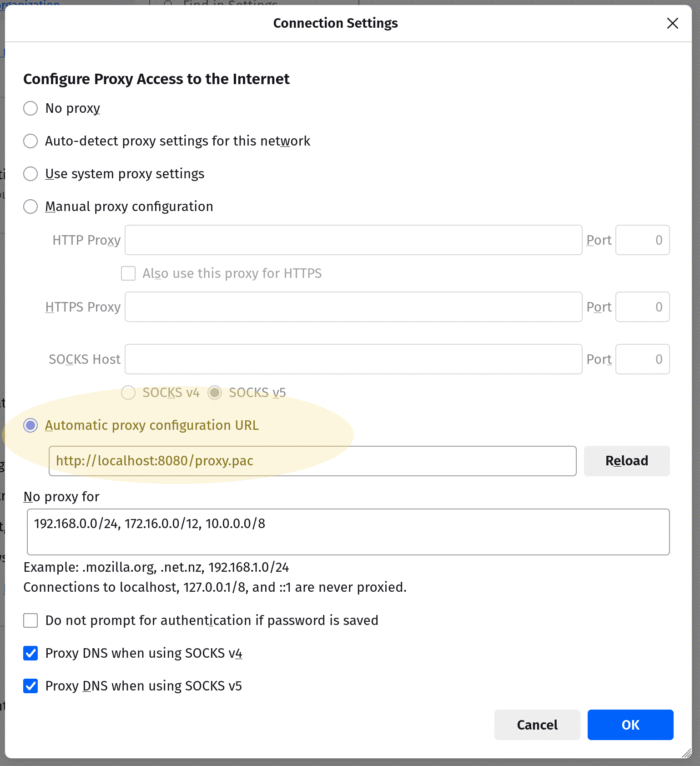
The proxy definition file is available on your local computer at http://localhost:8080/proxy.pac. Important: the port 8080 has to be in line with the Docker settings as explained above. It might be that on your local system, it is not port 8080 but maybe 8079, 8078 or 8081 (or anything else around 8000). To use this proxy file and to be able to browse the I2P and Tor network, open your browser settings and set it like this:
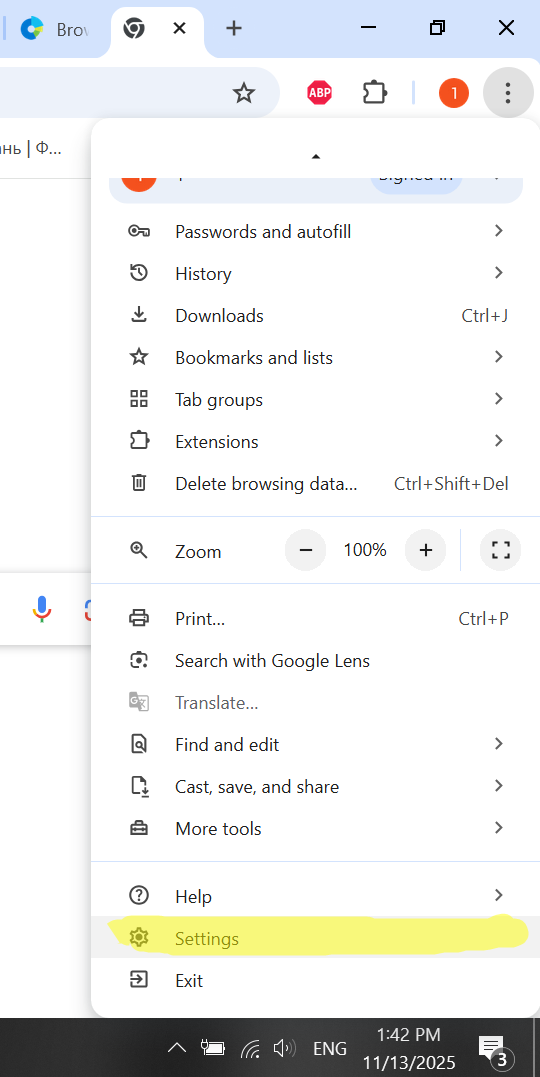
Installation on Chrome
Important: before you change your settings below, make a screenshot of your existing settings and store the screenshot somewhere locally on your computer to restore your settings in case you would like to not use I2P and Tor no more.
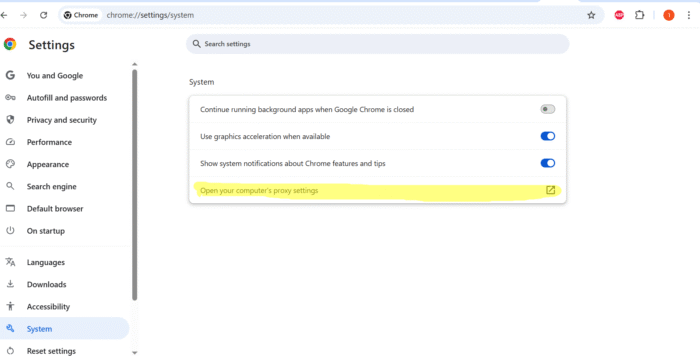
Select Browser Settings (three dots on the right side):
Then select System at the bottom of the menu.
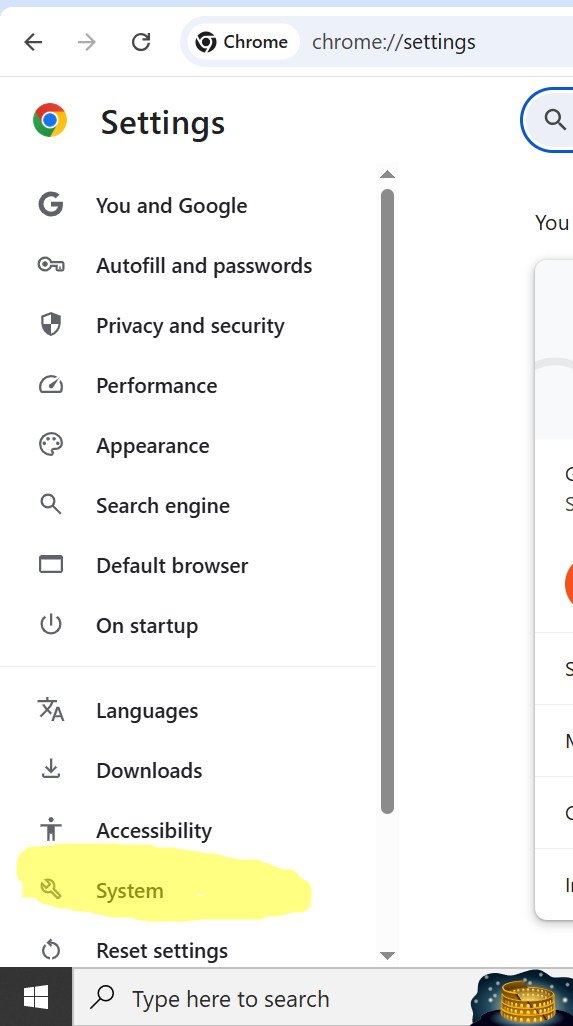
In the System menu, select Proxy settings.
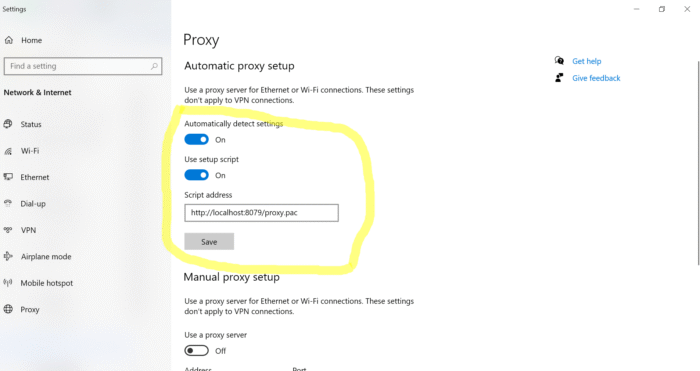
Configure the proxy as shown in the screenshot.
Important: the port 8079, as shown in the screenshot below, has to be in line with the Docker settings as explained above. It might be that on your local system, it is not port 8079 but maybe 8080, 8078 or 8081 (or anything else around 8000). Click Save.
Restart your Chrome browser, and you are now connected to the I2P network.
After you have applied this setting, your browser is able to browse I2P sites (so-called eepsites, like http://diva.i2p) and all the regular sites on the internet (like https://www.diva.exchange) are accessed through the Tor network.
To revert your settings, simply remove the proxy setting within your browser settings, stop and delete the Docker container.
Conclusion
Installing I2P is straightforward and secure: use container technology to isolate I2P and Tor. Beginners will find the normal installer easiest, while users who value a clean system and stronger security may prefer Docker.
Gain access to a privacy-focused network, explore I2P websites, and protect your digital identity more effectively.
THIS IS DIVA.EXCHANGE
The non-profit association diva.exchange, Switzerland, uses a barrier-free and collaborative approach to create free banking technology for everyone. Open-source technology ensures the privacy of all participants in the financial system of the future. The blockchain-based system is fully distributed. Everyone can participate in diva.exchange.
Diva.exchange is committed to the belief that only commercially free technology can reliably protect user privacy.
Collaboration with the scientific community plays an important role in the development of diva.exchange. The results of diva.exchange research are constantly being validated by academic institutions and publicly presented at specialised conferences.
LEARN MORE ABOUT OUR WORK
All technical information is available at: https://github.com/diva-exchange/
I2P beginner’s guide and installation guide (Version 2020):
https://www.diva.exchange/en/privacy/introduction-to-i2p-your-own-internet-secure-private-and-free/
All videos are here: https://odysee.com/@diva.exchange:d/
Introduction to I2P: https://en.wikipedia.org/wiki/I2P
Testnet of diva.exchange: https://testnet.diva.exchange
CONTACT US
Twitter: https://twitter.com/@DigitalValueX
Mastodon: https://social.diva.exchange/@social
If you still have questions you can always find us on Telegram: https://t.me/diva_exchange_chat_de (in English, German, or Russian)